Explorer Mods
My current audio victim is a 1998 Ford Explorer Sport - 2 door, 4.6L V6, 4x4.
I bought it used at a price that still has me waiting to see what major piece of this vehicle is hangin' on by a thread.
The radio didn't work, mostly, and the face of the unit was loose. Someone clueless tried to remove the head unit and didn't know how so they just yanked.
Whatever - there's no such thing as an acceptable factory stereo :-)
New head unit was task one.
I bought a Pioneer DEH-P7200HD to put in. It'll be good enough to drive the factory speakers but probably won't be the head unit that will drive the amps once I decide how stupid I want to be with this.
I like Crutchfield and set up my vehicle in their magick configurator. It asked me if I had the standard stereo, the premium audio, or the MACH audio system. Hell if I know - I didn't get an owner's manual with this.
So I google. And short of removing body panels or the radio there is no certain way to tell. I talk to a local installer and he assures me that if I don't have a power antenna, I have the standard stereo. Works for me.
I order my head unit and it comes with the usual Crutchfield goodies. Let the fun begin...
| |
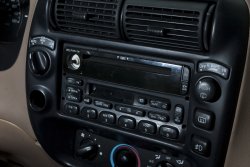
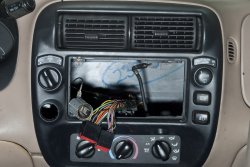
The factory unit. I'm guessing they grabbed this by the cassette port and yanked. Yeah - the lighter is still back there and it'll get fixed (or relocated) during this phase so I'll have 2 power ports in front.
|
|
As expected this didn't come out with the proper tool and method. The right side freed, but the left is still locked in and bottom flanges that are supposed to be on the outside of the trim panel are tucked behind it.
|
|
Those middle and bottom side flanges have got to get out of the way. I can either get the bottom flanges out or the side. Yeah - I used a rubber mallet and a small slotted screwdriver.
|
| |
In the process of fighting flanges, the unit just kinda dropped back and down. Okay - I can take a hint. I pulled the trim off and the unit just came out of the back. Probably because I tore off the face plate first :-)
|
|
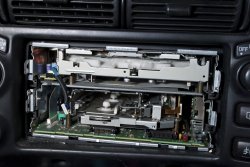
Head unit out of the way, wiring harnesses pulled forward.
|
|
|
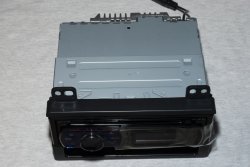
I knew as soon as I saw the back of the unit that I didn't have the standard factory option. The standard option only uses one harness.
But this didn't match what I had read I would see if I had the premium audio package. I should see 2 harnesses, one square with 2 rows of connectors and the other one narrow with a single row of conductors.
What I'm looking at are a square connector with 3 rows of connectors and a rectangular harness with 2 rows.
Oh yippee. A third option that I had not run across doing my homework. I wonder if this is the referenced, but never described, MACH audio option.
(time passes and Doug googles some more)
Looks like that's the answer - MACH audio is also called "dual-media" audio as the head unit has both CD and cassette.
| |
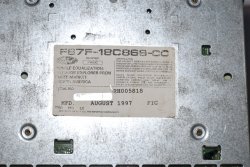
Factory stereo label. F87F-18C868-CC - FH-2216ZF - S/N RH005818
|
|
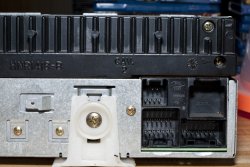
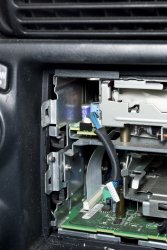
Wide view radio harness connectors. top square is not used.
|
|
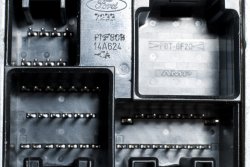
Tight view radio harness connectors. part numbers visible. 14A624
|
Did more poking around on Crutchfield's site and looked at the harness they recommend for MACH audio. It doesn't look right either.
So I called them. And sent them links to some of these pictures. And he put me on hold to do some research and came back with an answer.
The MACH audio package uses the standard audio harness and a secondary harness for the CD changer and the rear seat controls. The "normal" harness will work with the rectangular vehicle harness.
| |
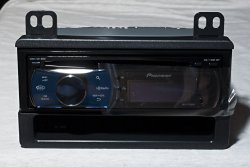
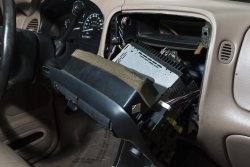
New head unit installed in the dash adapter.
|
|
The head unit is held in the adapter by the sleeve that came with the head unit.
|
|
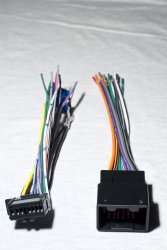
The harnesses. The smaller one is the harness for the heard unit. The larger one connects to the vehicle's harness.
|
| |

Harnesses connected. Follow the wiring diagrams from both harnesses and match the wires. Twist the stripped ends together.
|
|
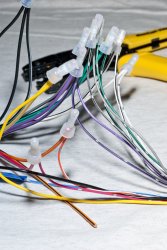
Crimp connectors both ensure the electrical connection and insulate the bare wires from each other and the frame of the vehicle.
|
|
Cut off the 2 screw tabs at the top of the dash adapter. Connect the antenna and the wire harnesses. Slide the entire assembly through the front of the trim panel until it locks into place.
|
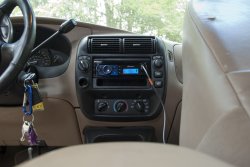
Done.
P.S. This vehicle has finally died. Next victim...